Don’t set out on a trip in your new or used RV without being armed with essential RV knowledge. And one of those pieces of knowledge is dealing with your black tank – including how to attach the sewer hose and flush the black tank. Gross? Yes. But, if you learn the proper technique and handle it responsibly, you can enjoy a clean and healthy camping trip. Let’s get started!
Attach Your Sewer Hose to the Black Tank
RV sewer hoses usually come in a variety of lengths, ranging from 10-20 feet. If the sewer outlet on your RV is further than 10’ from the dump station, use connecting extension sewer hoses. You can check for all of the sewer hoses and other equipment in our parts catalog here.
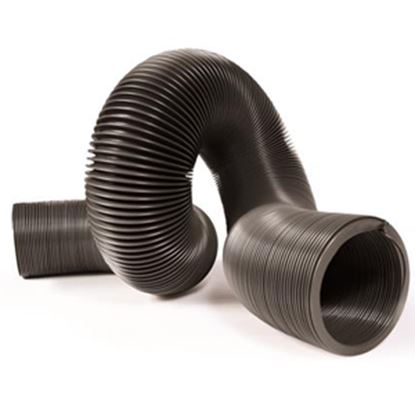
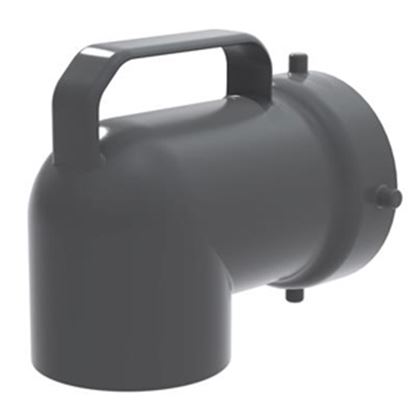
First, attach the elbow lock onto one end of the sewer hose. This end attaches to the dump station. Do not go any further if you don’t have the elbow lock! If you use a clear elbow lock, it lets you see what’s coming out of the black tank, whether or when it’s empty, and the clarity of the water. As much as you probably don’t want to look at sewage water, it’s a helpful piece of the process to make sure the process is going correctly.
The opposite end of the hose has four locking tabs, which simply lock directly onto the matching four tabs on your RV’s sewer mount. Click it into place and you’re just about ready!
Next, you’ll need to remove the valve cap on the sewer mount. If you have questions about the position of the handle, feel free to reach out to us for help. It’s not a difficult process, but you definitely want to make sure you get right the first time!
Always, always, always empty the black tank first, followed by the grey tank. The soap and water that flow out from the grey tank serve a bonus purpose: they flush the sewer hose, which means it’s cleaned as you go.
Should I Bother With a Black Tank Flush?
Like running the grey tank water through the hose to clean it after you empty the tank, a black tank flush sends fresh, clean water through the black tank during or just after you dump. That clean water simply cleans out the black tank and helps keep it as clean as possible. Ideally, try to do a black tank flush while you dump.
To do a black tank flush, you’ll need to first identify where the black tank flush connection is. Label it clearly right away if it isn’t already marked. You absolutely don’t want to get this connection mixed up with the city water connection!
Attach your hose the same way like a regular garden hose – just like a city water connection. When you have a good, sealed connection to the gasket, it’s go time!
Make sure you have the black tank valve open before you turn on the water. If there’s anything in the black tank that hasn’t dumped yet, or has caused a clog, the water you’re pumping in can basically pressurize the tank. Opening the valve will relieve that pressure. Get the water going and run the flush until the water runs clear through the elbow lock.
The topic of black tank dumps and flushes isn’t exactly a pretty topic, but if you get the dirty jobs done right, you can enjoy a clean camping trip. Contact us today if you have questions about the process, sewer hoses or other parts you need from our parts catalog, or any of our new or used RVs for sale.
